A Clover Patch in a Pot: A Small Growing Plan
A clover patch in a pot can suit a windowsill, balcony or doorstep. Choose a sensible container, make room for spreading growth and tend it patiently.
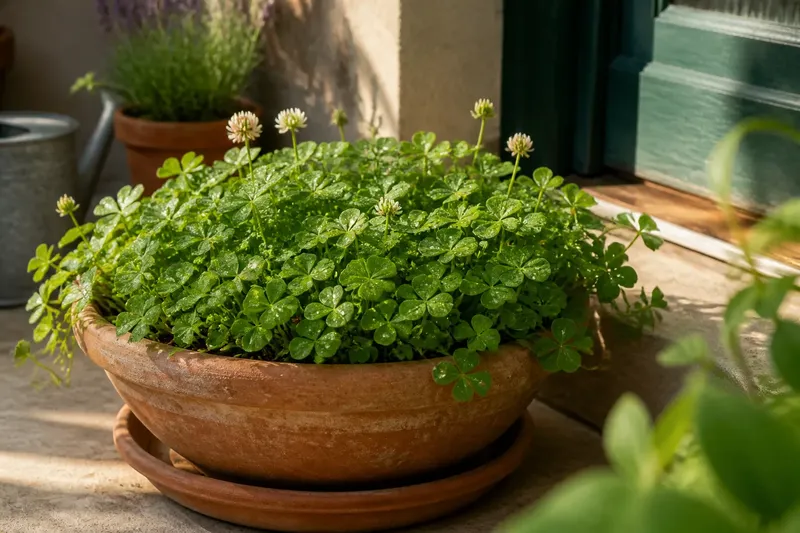
You have a spare terracotta pot, a packet of clover seed and a sunny corner by the back door. A clover patch in a pot is a modest project, but the container and growing conditions shape whether it becomes a settled patch or a crowded handful of stems. Choose a setup that fits the spot and the time you can give it, then let the plants establish at their own pace.
Choose a growing approach
There are three useful ways to start: sow seed in a roomy pot, use a smaller pot as a temporary nursery, or grow a young plant already rooted in compost. The first gives you control over the patch from the outset. A nursery pot saves space while seedlings develop, while a rooted plant gives you a visible starting point without the wait for germination.
For most home growers, a broad container is more useful than a deep, narrow one. Clover spreads close to the compost surface, so horizontal room helps it fill the pot without forcing stems into a tight clump. A pot with drainage holes is essential for ordinary outdoor compost; a saucer can catch run-off, but empty standing water rather than leaving the roots saturated.
- Direct sowing: Suits anyone with a prepared spot and patience for seedlings to emerge. It is a simple choice when you want a patch to develop in place.
- A nursery pot: Suits a small windowsill or a grower who wants to watch seedlings before assigning them a permanent home. It means moving or thinning plants later.
- A rooted young plant: Suits someone who wants an established start or has limited time for seedling care. Check that it is a suitable clover for the intended location rather than assuming every clover grows alike.
Say you have a broad, shallow planter on a bright balcony and want a patch to watch through the season. Direct sowing there makes sense if the planter has drainage and the compost can stay lightly moist during establishment. If the only available spot is a narrow indoor ledge, begin with a small nursery pot instead and choose a permanent container only after you see how the plants respond to the light.
Match the pot to growth
Give the patch room to spread rather than packing the surface with seed or several young plants. Crowding can leave leaves competing for light and make the compost harder to inspect and water evenly. Follow the sowing density on the seed packet, and thin seedlings if they emerge in a dense mat. Keep the strongest plants with enough space around them to form a low, leafy cover.
Material matters less than drainage and a stable place to grow. Terracotta lets compost dry more readily than many glazed pots, so it may need more frequent checks in warm, exposed positions. Plastic holds moisture for longer, which can be useful in a breezy spot but calls for care against waterlogging. A glazed ceramic pot can work too, provided excess water can escape.
Consider the pot’s final position before filling it. Moving a heavy planter after watering is awkward, and a sheltered spot can differ sharply from an exposed balcony in wind and drying. A small pot is easier to handle, but it also offers less compost to buffer changes in moisture. If you expect the patch to remain in one place, choose a container that gives roots and spreading stems room without becoming inconvenient to tend.
Prepare compost and sow
Use fresh, general-purpose peat-free potting compost suitable for containers. Avoid garden soil in a pot: it can be dense and may drain poorly in a small container. Fill the pot loosely, leaving a little space below the rim so watering does not wash compost over the edge. Moisten the compost before sowing, aiming for an even dampness rather than a soggy surface.
Scatter seed thinly over the surface, then cover it only as directed on the packet. Clover seed is small, so a thick layer of compost can make emergence harder. Water gently with a fine rose or a spray bottle, taking care not to sweep seeds into a pile. Set the pot somewhere with suitable light for the clover type you have chosen; the packet’s growing guidance should inform the placement.
Keep the surface from drying out while seedlings are establishing, but do not leave the pot sitting in water. Check with a fingertip rather than watering by habit: if the surface still feels damp, wait and check again later. Once growth is visible, water the compost when it begins to dry, adjusting for the pot, weather and position.
Keep expectations patient
Germination and filling out do not happen on a tidy schedule. Some seeds may appear before others, and a young patch can look sparse before leaves begin to spread. Resist the urge to add more seed immediately just because the surface is not yet covered; give the first sowing time to show what has taken. The seed packet provides the relevant germination guidance for that variety.
As the patch develops, remove weak or crowded seedlings carefully, leaving room for the rest to grow. Pick away dead leaves and check beneath the foliage for compost that remains wet. If stems stretch towards the light, consider whether the pot’s position suits the chosen clover rather than immediately adding fertiliser. A clover pot does not need constant feeding; use any fertiliser only if the product directions and the plant’s condition support it.
Flowering may attract visiting insects, so consider the pot’s location if it sits beside a doorway or in a busy seating area. If you plan to let flowers set seed, leave some blooms in place; if you prefer a leafy patch, remove fading flower heads. Either choice is a matter of the look and use you want from the pot.
Which setup fits your space?
Is a wide pot better than a deep one?
For a compact clover patch, a wide container usually gives spreading stems more useful surface area. Depth still matters for holding compost and moisture, but a very deep pot with little width can leave the patch cramped at the top.
Can clover grow indoors?
It can be attempted indoors where the selected clover receives suitable light and the pot drains well, though a dim room may produce weak, stretched growth. A bright windowsill or outdoor position is generally easier to assess than a shaded corner.
Should I sow seed or plant a rooted clump?
Choose seed if you have time to wait and want to establish a patch across the pot. Choose a rooted clump if you want an existing plant to settle in, while leaving space for it to spread and checking that the plant suits the intended conditions.
How do I choose between a nursery pot and a permanent pot?
Use a nursery pot when space is limited or you want to keep early growth easy to inspect. Sow in the permanent pot if its location is ready and you can provide suitable light, drainage and moisture without shifting it later.
Make the choice simply
Start with the place the pot will live, then work backwards. For a bright balcony or doorstep with room for a broad planter, direct sowing is a straightforward option. For a cramped sill or uncertain location, use a nursery pot and postpone the final placement decision. If patience is the main obstacle, a rooted young plant offers a visible start, provided it is the right type for the spot.
For a clover patch in a pot, a manageable container and steady attention matter more than an elaborate arrangement. Choose drainage, leave room for growth, and check the compost before watering. The useful sign of progress is not a pot instantly covered in leaves, but seedlings that remain healthy as they gradually occupy their space.